Building my photos web site with CubicWeb part V: let's make it even more user friendly
We'll now see how to benefit from features introduced in 3.9 and 3.10 releases of CubicWeb
Step 1: tired of the default look?
OK... Now our site has its most desired features. But... I would like to make it look somewhat like my website. It is not www.cubicweb.org after all. Let's tackle this first!
The first thing we can to is to change the logo. There are various way to achieve this. The easiest way is to put a logo.png file into the cube's data directory. As data files are looked at according to cubes order (CubicWeb resources coming last), that file will be selected instead of CubicWeb's one.
Note
As the location for static resources are cached, you'll have to restart your instance for this to be taken into account.
Though there are some cases where you don't want to use a logo.png file. For instance if it's a JPEG file. You can still change the logo by defining in the cube's uiprops.py file:
LOGO = data('logo.jpg')
The uiprops machinery has been introduced in CubicWeb 3.9. It is used to define some static file resources, such as the logo, default Javascript / CSS files, as well as CSS properties (we'll see that later).
Note
This file is imported specifically by CubicWeb, with a predefined name space, containing for instance the data function, telling the file is somewhere in a cube or CubicWeb's data directory.
One side effect of this is that it can't be imported as a regular python module.
The nice thing is that in debug mode, change to a uiprops.py file are detected and then automatically reloaded.
Now, as it's a photos web-site, I would like to have a photo of mine as background... After some trials I won't detail here, I've found a working recipe explained here. All I've to do is to override some stuff of the default CubicWeb user interface to apply it as explained.
The first thing to to get the <img/> tag as first element after the <body> tag. If you know a way to avoid this by simply specifying the image in the CSS, tell me! The easiest way to do so is to override the HTMLPageHeader view, since that's the one that is directly called once the <body> has been written. How did I find this? By looking in the cubiweb.web.views.basetemplates module, since I know that global page layouts sits there. I could also have grep the "body" tag in cubicweb.web.views... Finding this was the hardest part. Now all I need is to customize it to write that img tag, as below:
class HTMLPageHeader(basetemplates.HTMLPageHeader):
    # override this since it's the easier way to have our bg image
    # as the first element following <body>
    def call(self, **kwargs):
        self.w(u'<img id="bg-image" src="%sbackground.jpg" alt="background image"/>'
               % self._cw.datadir_url)
        super(HTMLPageHeader, self).call(**kwargs)


def registration_callback(vreg):
    vreg.register_all(globals().values(), __name__, (HTMLPageHeader))
    vreg.register_and_replace(HTMLPageHeader, basetemplates.HTMLPageHeader)
As you may have guessed, my background image is in a background.jpg file in the cube's data directory, but there are still some things to explain to newcomers here:
- The call method is there the main access point of the view. It's called by the view's render method. It is not the only access point for a view, but this will be detailed later.
- Calling self.w writes something to the output stream. Except for binary views (which do not generate text), it must be passed an Unicode string.
- The proper way to get a file in data directory is to use the datadir_url attribute of the incoming request (e.g. self._cw).
I won't explain again the registration_callback stuff, you should understand it now! If not, go back to previous posts in the series :)
Fine. Now all I've to do is to add a bit of CSS to get it to behave nicely (which is not the case at all for now). I'll put all this in a cubes.sytweb.css file, stored as usual in our data directory:
/* fixed full screen background image
 * as explained on http://webdesign.about.com/od/css3/f/blfaqbgsize.htm
 *
 * syt update: set z-index=0 on the img instead of z-index=1 on div#page & co to
 * avoid pb with the user actions menu
 */
img#bg-image {
    position: fixed;
    top: 0;
    left: 0;
    width: 100%;
    height: 100%;
    z-index: 0;
}

div#page, table#header, div#footer {
    background: transparent;
    position: relative;
}

/* add some space around the logo
 */
img#logo {
    padding: 5px 15px 0px 15px;
}

/* more dark font for metadata to have a chance to see them with the background
 *  image
 */
div.metadata {
    color: black;
}
You can see here stuff explained in the cited page, with only a slight modification explained in the comments, plus some additional rules to make things somewhat cleaner:
- a bit of padding around the logo
- darker metadata which appears by default below the content (the white frame in the page)
To get this CSS file used everywhere in the site, I have to modify the uiprops.py file introduced above:
STYLESHEETS = sheet['STYLESHEETS'] + [data('cubes.sytweb.css')]
Note
sheet is another predefined variable containing values defined by already process uiprops.py file, notably the CubicWeb's one.
Here we simply want our CSS in addition to CubicWeb's base CSS files, so we redefine the STYLESHEETS variable to existing CSS (accessed through the sheet variable) with our one added. I could also have done:
sheet['STYLESHEETS'].append(data('cubes.sytweb.css'))
But this is less interesting since we don't see the overriding mechanism...
At this point, the site should start looking good, the background image being resized to fit the screen.
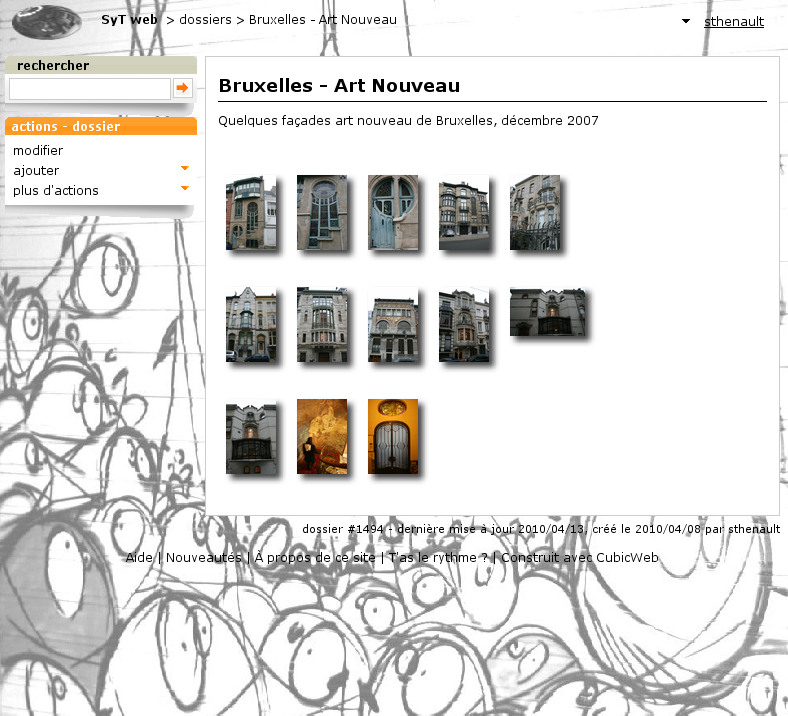
The final touch: let's customize CubicWeb's CSS to get less orange... By simply adding
contextualBoxTitleBg = incontextBoxTitleBg = '#AAAAAA'
and reloading the page we've just seen, we know have a nice greyed box instead of the orange one:
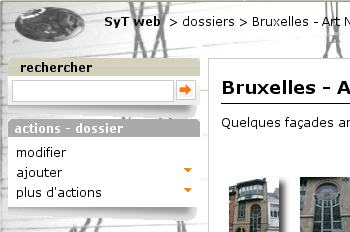
This is because CubicWeb's CSS include some variables which are expanded by values defined in uiprops file. In our case we controlled the properties of the CSS background property of boxes with CSS class contextualBoxTitleBg and incontextBoxTitleBg.
Step 2: configuring boxes
Boxes present to the user some ways to use the application. Let's first do a few user interface tweaks in our views.py file:
from cubicweb.selectors import none_rset
from cubicweb.web.views import bookmark
from cubes.zone import views as zone
from cubes.tag import views as tag

# change bookmarks box selector so it's only displayed on startup views
bookmark.BookmarksBox.__select__ = bookmark.BookmarksBox.__select__ & none_rset()
# move zone box to the left instead of in the context frame and tweak its order
zone.ZoneBox.context = 'left'
zone.ZoneBox.order = 100
# move tags box to the left instead of in the context frame and tweak its order
tag.TagsBox.context = 'left'
tag.TagsBox.order = 102
# hide similarity box, not interested
tag.SimilarityBox.visible = False
The idea is to move all boxes in the left column, so we get more space for the photos. Now, serious things: I want a box similar to the tags box but to handle the Person displayed_on File relation. We can do this simply by adding a AjaxEditRelationCtxComponent subclass to our views, as below:
from logilab.common.decorators import monkeypatch
from cubicweb import ValidationError
from cubicweb.web import uicfg, component
from cubicweb.web.views import basecontrollers

# hide displayed_on relation using uicfg since it will be displayed by the box below
uicfg.primaryview_section.tag_object_of(('*', 'displayed_on', '*'), 'hidden')

class PersonBox(component.AjaxEditRelationCtxComponent):
    __regid__ = 'sytweb.displayed-on-box'
    # box position
    order = 101
    context = 'left'
    # define relation to be handled
    rtype = 'displayed_on'
    role = 'object'
    target_etype = 'Person'
    # messages
    added_msg = _('person has been added')
    removed_msg = _('person has been removed')
    # bind to js_* methods of the json controller
    fname_vocabulary = 'unrelated_persons'
    fname_validate = 'link_to_person'
    fname_remove = 'unlink_person'


@monkeypatch(basecontrollers.JSonController)
@basecontrollers.jsonize
def js_unrelated_persons(self, eid):
    """return tag unrelated to an entity"""
    rql = "Any F + ' ' + S WHERE P surname S, P firstname F, X eid %(x)s, NOT P displayed_on X"
    return [name for (name,) in self._cw.execute(rql, {'x' : eid})]


@monkeypatch(basecontrollers.JSonController)
def js_link_to_person(self, eid, people):
    req = self._cw
    for name in people:
        name = name.strip().title()
        if not name:
            continue
        try:
            firstname, surname = name.split(None, 1)
        except:
            raise ValidationError(eid, {('displayed_on', 'object'): 'provide <first name> <surname>'})
        rset = req.execute('Person P WHERE '
                           'P firstname %(firstname)s, P surname %(surname)s',
                           locals())
        if rset:
            person = rset.get_entity(0, 0)
        else:
            person = req.create_entity('Person', firstname=firstname,
                                            surname=surname)
        req.execute('SET P displayed_on X WHERE '
                    'P eid %(p)s, X eid %(x)s, NOT P displayed_on X',
                    {'p': person.eid, 'x' : eid})

@monkeypatch(basecontrollers.JSonController)
def js_unlink_person(self, eid, personeid):
    self._cw.execute('DELETE P displayed_on X WHERE P eid %(p)s, X eid %(x)s',
                     {'p': personeid, 'x': eid})
You basically subclass to configure with some class attributes. The fname_* attributes give the name of methods that should be defined on the json control to make the AJAX part of the widget work: one to get the vocabulary, one to add a relation and another to delete a relation. These methods must start by a js_ prefix and are added to the controller using the @monkeypatch decorator. In my case, the most complicated method is the one which adds a relation, since it tries to see if the person already exists, and else automatically create it, assuming the user entered "firstname surname".
Let's see how it looks like on a file primary view:
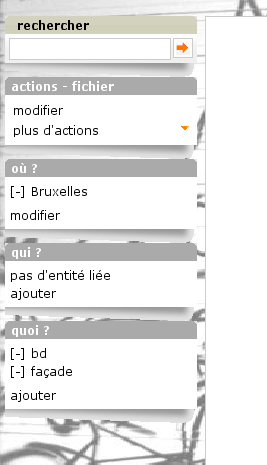
Great, it's now as easy for me to link my pictures to people than to tag them. Also, visitors get a consistent display of these two pieces of information.
Note
The ui component system has been refactored in CubicWeb 3.10, which also introduced the AjaxEditRelationCtxComponent class.
Step 3: configuring facets
The last feature we'll add today is facet configuration. If you access to the '/file' url, you'll see a set of 'facets' appearing in the left column. Facets provide an intuitive way to build a query incrementally, by proposing to the user various way to restrict the result set. For instance CubicWeb proposes a facet to restrict based on who created an entity; the tag cube proposes a facet to restrict based on tags; the zoe cube a facet to restrict based on geographical location, and so on. In that gist, I want to propose a facet to restrict based on the people displayed on the picture. To do so, there are various classes in the cubicweb.web.facet module which simply have to be configured using class attributes as we've done for the box. In our case, we'll define a subclass of RelationFacet.
Note
Since that's ui stuff, we'll continue to add code below to our views.py file. Though we begin to have a lot of various code their, so it's may be a good time to split our views module into submodules of a view package. In our case of a simple application (glue) cube, we could start using for instance the layout below:
views/__init__.py   # uicfg configuration, facets
views/layout.py     # header/footer/background stuff
views/components.py # boxes, adapters
views/pages.py      # index view, 404 view
from cubicweb.web import facet
class DisplayedOnFacet(facet.RelationFacet):
__regid__ = 'displayed_on-facet'
# relation to be displayed
rtype = 'displayed_on'
role = 'object'
# view to use to display persons
label_vid = 'combobox'
Let's say we also want to filter according to the visibility attribute. This is even simpler as we just have to derive from the AttributeFacet class:
class VisibilityFacet(facet.AttributeFacet):
    __regid__ = 'visibility-facet'
    rtype = 'visibility'
Now if I search for some pictures on my site, I get the following facets available:
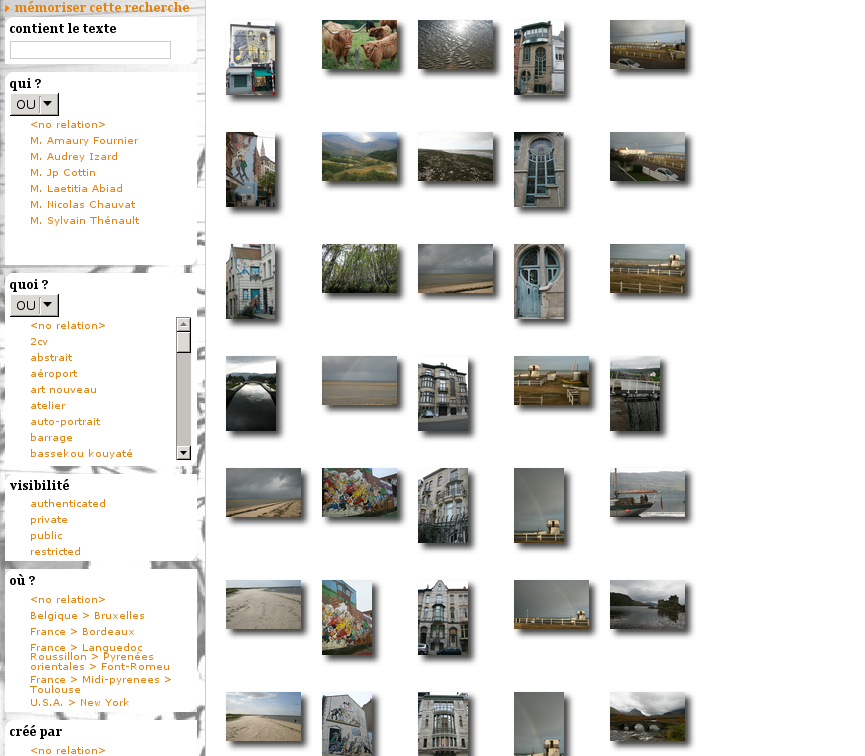
Note
By default a facet must be applyable to every entity in the result set and provide at leat two elements of vocabulary to be displayed (for instance you won't see the created_by facet if the same user has created all entities). This may explain why you don't see yours...
Conclusion
We started to see the power behind the infrastructure provided by the framework, both on the pure ui (CSS, Javascript) side and on the Python side (high level generic classes for components, including boxes and facets). We now have, with a few lines of code, a full-featured web site with a personalized look.
Of course we'll probably want more as time goes, but we can now concentrate on making good pictures, publishing albums and sharing them with friends...
